How to Mix a Song: 100 Tips in 30 Minutes
I wrote a song where every lyric tells me exactly how to mix the song itself. In this video, I'll share with you 100 tips to mix a song and to get it sounding n

Key Takeaways
- Fix it at the source - no plugin saves a bad sound or a bad take
- Never EQ in solo; a well-EQ'd track often sounds thin on its own
- Ride your gain before you compress - consistency beats squashing
- Keep kick, snare, bass and lead vocal centered and mono
- Done is a decision, not a feeling - ship the track
I wrote a song where every single lyric is a mixing instruction. Then I followed every command it gave me.
“Make it clean.” Okay, EQ. “Make it knock.” Low end. “Turn it down.” Gain staging. “Nail the fade.” Automation.
By the end I had 100 tips - plus one bonus - that took a demo recorded at GarageBand-in-7th-grade-science-class quality to something that actually sounds like a record.
I also made a full video on this…
All the ideas in this article come from the video below. If you don't feel like reading, well, I gotchu.
Here’s every single one of them, organized so you can actually use this as a checklist instead of just nodding along.
The Sounds - Where Every Mix Is Actually Won
It’s very hard for a song to mix itself if the song doesn’t exist in the first place.
So before anything else: you need an actual song. Songwriting is a whole separate beast and a whole separate video. This is about taking the song you already have and producing and mixing it so it sounds professional.
Which brings us to the single most important idea in this entire post.
1. Fix it at the source
If it doesn’t sound good as-is, it’s not going to sound good with processing.
That means re-recording a bad line. Re-choosing a bad sound. Or just being extremely deliberate about what you pick in the first place.
Sometimes the best EQ is a different sound. Seriously. Swapping a sample takes four seconds. Fighting a bad sample with three plugins takes forty minutes and still sounds worse.
2. Choose sounds that already complement each other
This matters most when I’m layering. For this song, I loved my verse idea but wanted to beef it up for the chorus - so I added a layer with more high-end information sitting on top of the low-end information I already had.
Not another low-end sound. A complementary one.
3. Change the octave instead of adding more stuff
When you’re layering and things aren’t fitting, moving something up or down an octave is often the fix.
4. Don’t stack the sub range
Don’t drop octaves too low. You really only need one bass-range part. Those frequencies are physically big and there’s only room for one idea down there.
5. Layer live-type instruments with your drums
I almost always throw something with real human playing into my drum programming. It adds a flavor that quantized samples just don’t have.
6. Tune every element to the key
I pitch-tune all my sound design choices so they match the key of the song. This is especially true for things you’d never think need tuning - kicks and snares. A kick that’s fighting your bass note is a kick that’s making your low end muddy.
7. Double track live parts and pan them hard
Record it twice, pan one hard left and one hard right. Instant width, zero plugins.
8. Give every section a different role
Each section of your song needs different sounds because each section has a different job. I’m constantly thinking about contrast between sections to make each one hit harder.
9. Introduce instruments gradually
One at a time. Don’t dump the whole arrangement on someone in bar one - it overwhelms the listener and kills your chorus payoff.
10. Use complete silence
One of the biggest contrast moves available to you. Right before the chorus, I drop out everything. When the chorus hits, it’s that much more powerful.
11. Understand that sounds are objective… and also not
If there’s one thing you take from this entire post: the sounds you choose at the beginning are the most important part of the mixing process.
And sound selection is subjective. There’s only so much a lyric can tell me about what sounds to pick - at the end of the day I’m choosing what sounds good to me. That’s allowed.
Setup & Organization - “Turn It Down”
An unorganized session is like trying to find your keys in a messy room. You know they’re in there. You also know you’re not finding them in time for your meeting.
Speaking for a friend.
Naming your tracks “Audio 23” won’t change them sonically. But organizing will save you enormous headaches later.
12. Learn your key commands
Learn the shortcuts for the things you use most. My setup: right hand on the mouse, left hand on the keyboard.
The two biggest for me:
- D - delete the highlighted selection
- W - clip mute, toggle a clip on and off
13. Build a color system
I color like-instruments the same way, almost always. One glance and I know what’s happening in the session.
14. Group like instruments into buses
All the drums into a drum bus. All the guitars into a guitar bus. Makes processing later way faster.
15. Separate instruments from vocals
I route all instruments to an instruments bus, then everything goes to a submix bus. That way I can automate the entire instrumental or the entire mix later without touching my master chain.
16. Mute test everything
Everything in your track should serve a purpose. Mute a clip. If you don’t hear a difference?
Delete it.
17. Clip gain your live performances first
Before anything else, I go through live takes and clip gain them so the volume is reasonably consistent. Your compressor will thank you.
18. Hide tracks instead of deleting them
If you’re not sure about a track but might come back: clip mute it, hit H to open the hide menu, hide it, hit H again. Out of sight, still there.
19. Build preset channels
I have go-to channel setups I reuse constantly so I’m not loading plugins one at a time. This is especially true on my master stereo out - metering and referencing tools that are always there. You can do the same for drums, vocals, whatever.
20. Get a rough balance before any plugins
Before I add a single plugin, I want a rough mix that already sounds decent.
Why? Because your best plugin is your fader. How loud something is dramatically changes how you perceive it. Fix the balance first and half your “EQ problems” disappear.
EQ - “Make It Clean”
Cleaning up the sound, to me, means EQ. Here’s how I think about it.
21. Know your zones
Learn what each frequency region actually does. Lows, low mids, mids, upper mids, air. You can’t fix what you can’t name.
22. Never EQ in solo
It doesn’t matter how something sounds by itself. It matters how it fits with the rest of the mix.
This is the tip I wish I’d taken seriously years earlier.
23. Use sidechain dynamic EQ to carve space
You can duck specific frequencies on one instrument whenever another instrument plays. On this song, I used my voice to duck the upper-mid range of the entire instruments bus. The vocal cuts through without me having to permanently gut the instrumental.
24. Kill resonances using the key of the song
Live recordings throw weird resonances at you all the time. My trick: I know the song’s in G minor, so I find the offending note on the EQ, and if it’s not in G minor, I get rid of it guilt-free.
If it is in the key but still ringing out, I’ll use a dynamic EQ so it only clamps down when it’s actually a problem.
25. Use tilt EQ for sound design
Great for quickly making something darker or brighter as a creative move rather than a corrective one.
26. Mono your low end with mid/side EQ
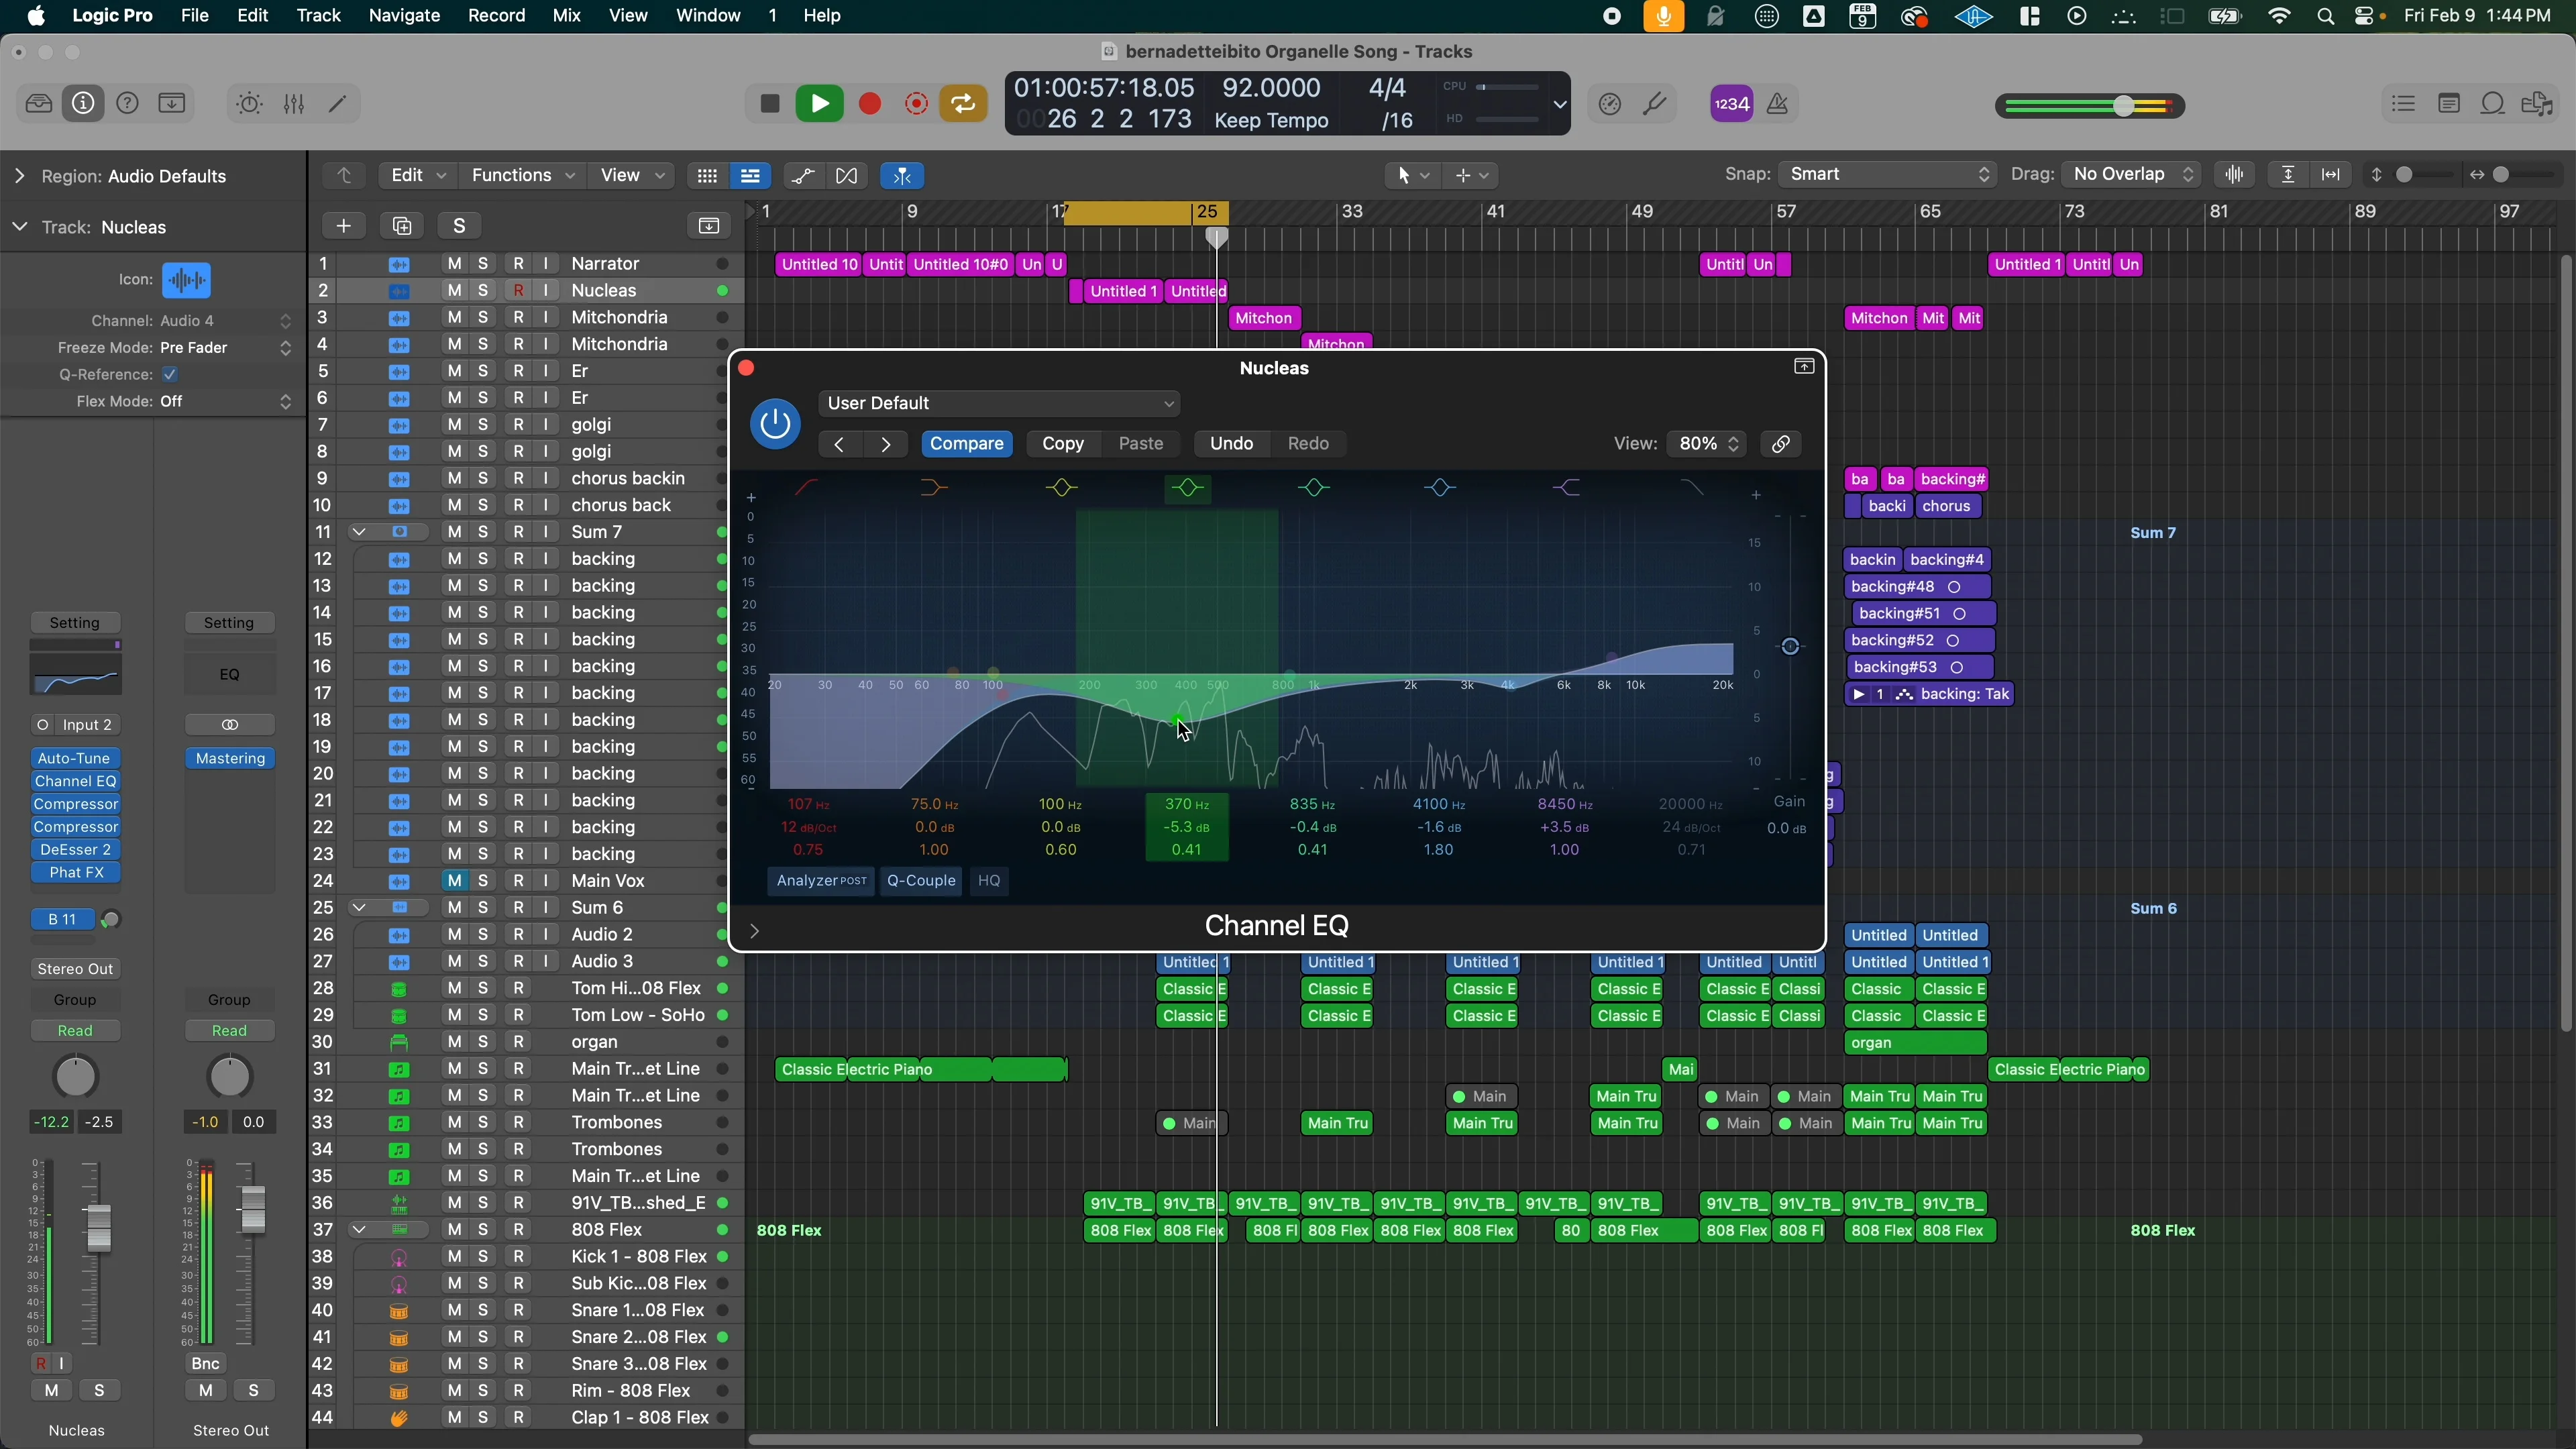
On my master out I use a mid/side EQ to make the bottom end mono - killing the sides below roughly 120 Hz. Tighter, more translatable low end.
27. Check your mix in mono
Put a gain plugin at the very end of your master chain with a mono switch. Engage it anytime you want to check. This is where phase compatibility issues show their face - and where you find out what your mix sounds like on a phone speaker.
28. Flip polarity to hunt phase problems
Same plugin, flip the polarity. If it sounds thin when you flip it, things are generally in phase. If flipping makes it sound better, you’ve got a problem to solve.
The null test - the best way to hear what a plugin actually does
Not sure what a plugin is doing? Duplicate the track. Flip the polarity on the duplicate. Play both - you’ll hear nothing, because they cancel out completely.
Now engage the EQ on one of them. You’ll hear only what the plugin is adding and nothing it isn’t.
This works with any type of plugin, and it’s especially eye-opening on saturation.
EQ takeaway
EQ is one of the sharpest tools in your belt. Spend real time with it.
And remember: a well-EQ’d instrument in solo often sounds thin and lacking. That doesn’t mean you did a bad job. It means you mixed in context, which is exactly what you were supposed to do.
Compression - “Give It Sustain”
Compression is EQ’s younger brother. It’s all about controlling volume.
A track that’s consistently the same loudness will be easier to hear through a dense mix than one that jumps around. Or in caveman speak: loud loud soft soft bad.
29. Ride the gain before you compress
Before I touch a compressor, I ride the gain so the performance is already more consistent.
I got so tired of doing this by hand that I built a plugin for it - magic.RIDE. It analyzes every syllable individually and turns it up or down based on what it needs. It’ll also write the automation for you if you’d rather have it as visible clip gain.
30. Understand attack and release
These two knobs shape the transient more than anything else:
- Slower attack = more pokey, transients punch through
- Faster attack = rounded transients, less noticeable attack
31. Think of release as breathing
Ideally, your compressor is fully disengaged before the next hit engages it again. Dial it in by ear until it breathes with the track.
32. Use two compressors instead of one
Instead of asking one compressor to do everything, stack two with different jobs:
- One fast compressor catching transient peaks
- One slow compressor riding the overall level
Way more natural than slamming one unit.
33. Parallel compression
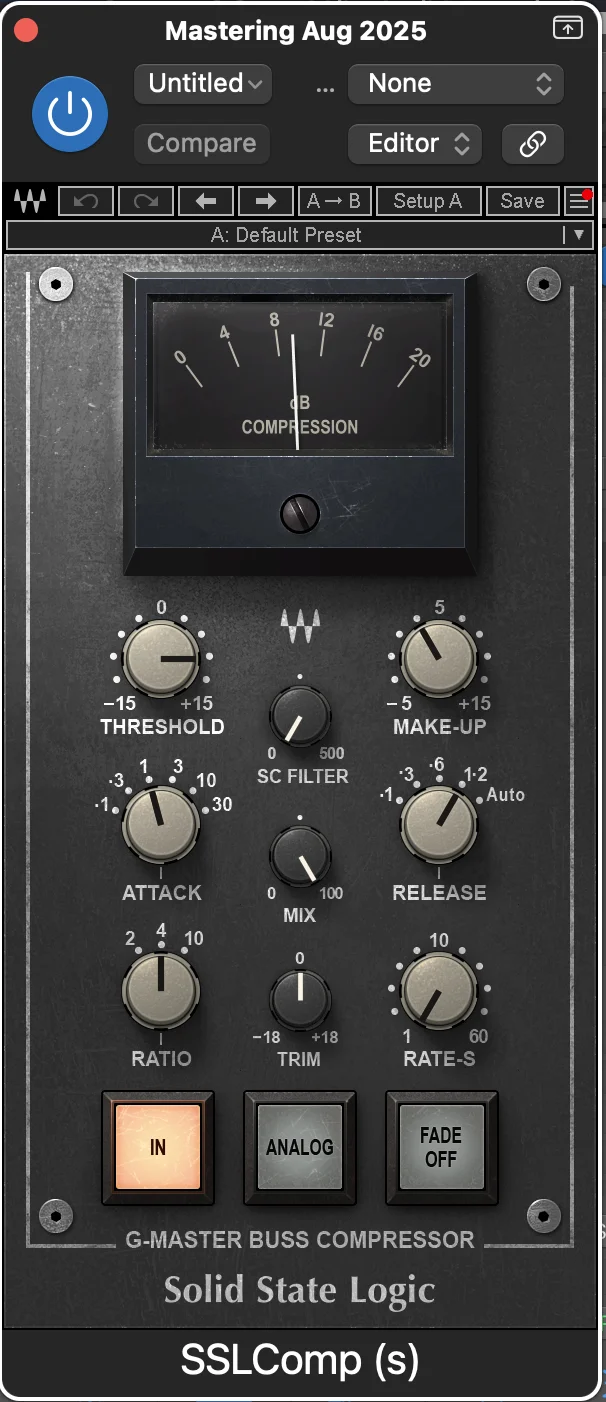
Duplicate your track with the exact same settings, then take one of the compressors and absolutely smash it. Mix that crushed signal in underneath to taste.
You get the dynamics of the live performance plus the consistency of a heavily compressed one.
34. Or just use the mix knob
Most modern compressors have a mix knob. Same result, one track instead of two.
35. Use a transient designer when compression isn’t enough
Sometimes a compressor just won’t give you the punch you need. An enveloper or transient shaper will. And the opposite is true - you can pull transients down with one too.
36. Bus glue compression
I like one compressor on a bus to glue everything together. A good starting formula:
- Attack - down pretty significantly
- Release - up
- Ratio - down slightly (low ratio)
- Threshold - dial in until you’re getting a couple dB of reduction
The compression warning
Too much compression sucks the life out of a performance. There’s a balance, and the balance is usually less than you think.
Saturation - “Tube Tapes”
After compression, my tracks were consistent but skinny. Ozempic Skeletor tracks. We’re looking for well-rounded natties here.
Saturation is how you add beef.
37. Know what saturation actually is
It’s controlled distortion doing two things: rounding off transient peaks (like a compressor) and adding overtones/harmonics.
38. Know your flavors
- Tube - thickens the mids
- Tape - rounds off the top, adds some transient character
- Clipper - literally cuts the tops off the waveforms
39. Always level match
Saturation adds harmonics, which makes things feel louder than they are. Level match before you judge, otherwise you’ll convince yourself you’re adding richness when you’re actually just adding mud.
40. Clip your drum bus
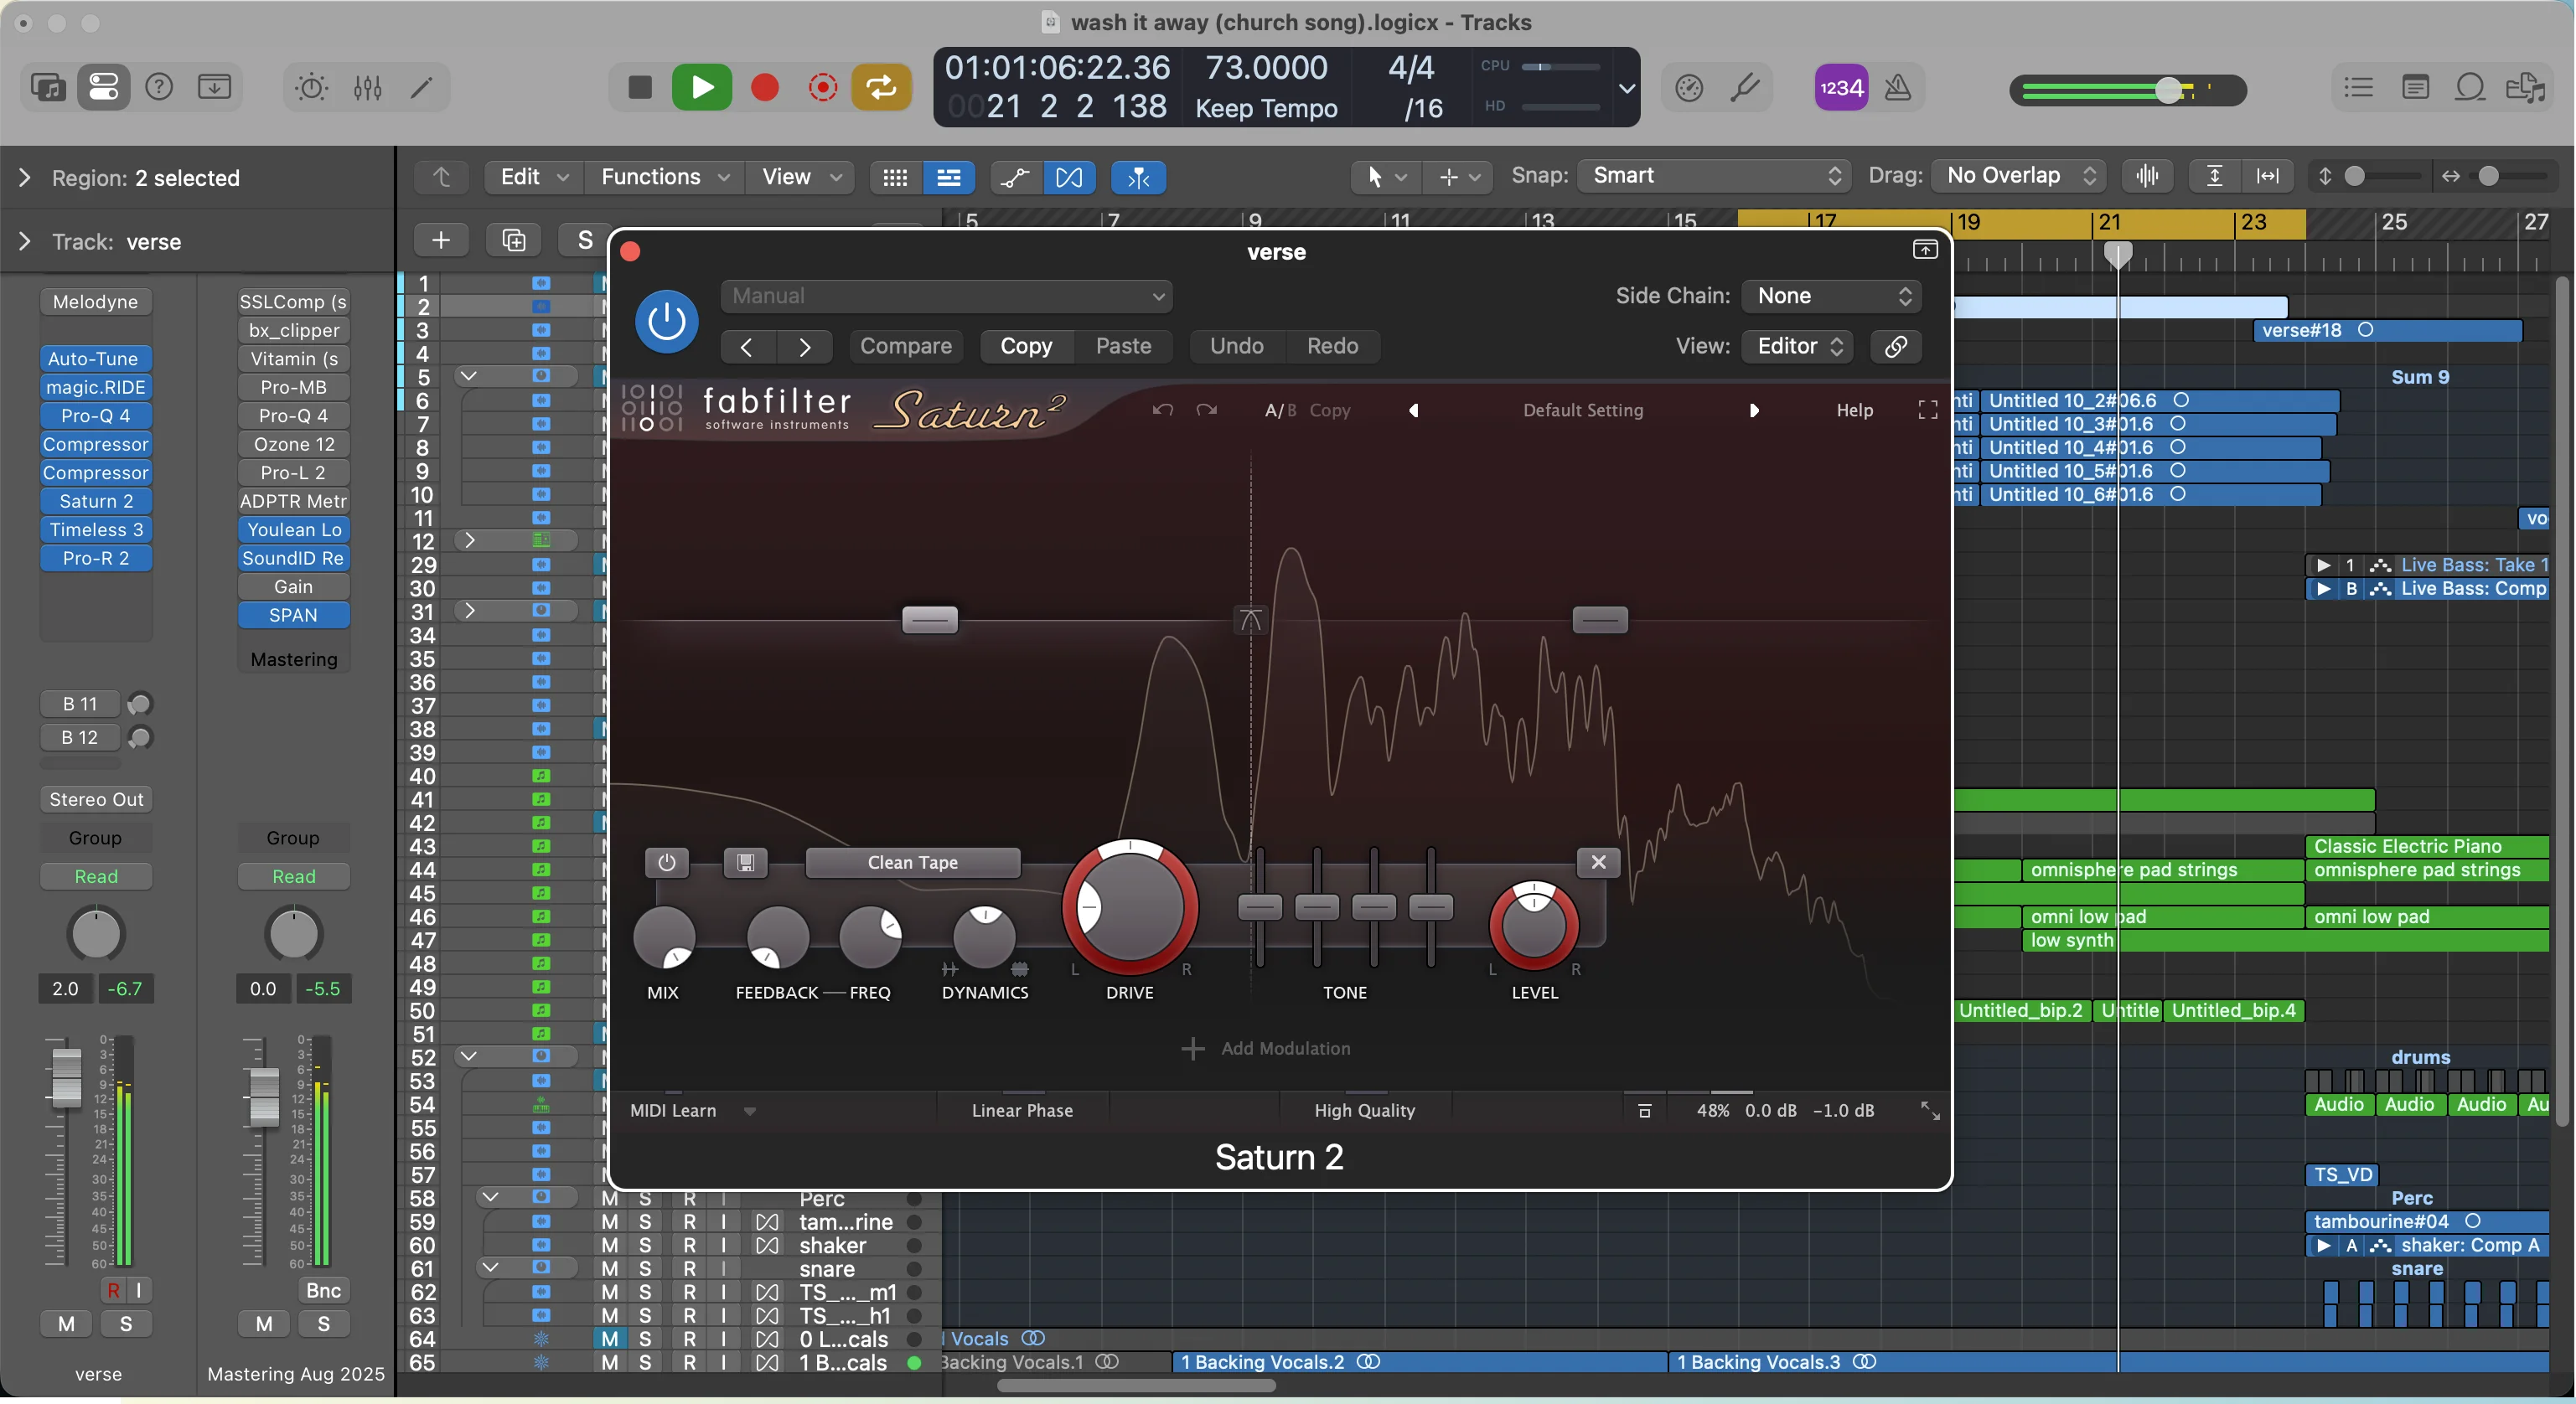
My favorite place to clip is the drum bus. The kick (or the bass) is almost always what triggers your limiter first - so clip it slightly beforehand and you can push your master noticeably louder than you otherwise could.
41. Heavily saturate the bass
Most basses live almost entirely in the low end. To hear them on phone speakers, you need those upper harmonics. Saturation is how you get them.
42. Parallel distortion
Same strategy as parallel compression. Duplicate the track, crank the saturation on one, blend it in. Or use the mix knob if your plugin has one.
Vocals - “Ride the Vocal”
Vocals are the hot girl at the club. Everybody’s looking. Everybody wants to hear them. Them just being there means people notice - which is exactly why we need to mix them right.
This is what I focus on most, so buckle up, there’s a lot here.
43. Ride the vocal gain through the entire song
Every word should be audible. Sometimes I do this with volume automation, but lately it’s almost entirely magic.RIDE doing the heavy lifting.
If you want to test the concept without spending money, grab the free vocal rider.
44. Tune your vocals
Genre-dependent, but I tune a lot. It makes vocals sound more polished and more professional.
45. Check every note individually
I go note by note and make sure it feels natural. If it sounds pitch corrected, I’ve gone too far.
46. Manually reduce harsh esses
If a de-esser can’t handle an S, do it by hand. Isolate the S, fade it in slightly so it comes in less harsh. Same technique works for plosives.
47. EQ vocals toward the hits
When I EQ vocals, I use a plugin I built (magic.CURVE) that analyzes my vocal’s EQ curve and compares it against 3,000+ hit vocals, then moves mine toward that target.
If you want a shortcut to a finished vocal chain instead, Vocal Magic is my preset pack that works in any DAW - and there are 10 free presets here if you want to test drive it.
48. Use background vocals - they matter more than you think
They’re not decoration. They’re structural.
49. Build BGVs from your MIDI chords
Here’s exactly what I did: I took the chords I was already playing in MIDI, looked at every individual note in the chord, and recorded the lyric on each one of those notes.
Instant, perfectly voiced harmony stack that’s guaranteed to sit in the harmony.
50. Pitch correct your background vocals hard
The more in tune and on time your BGVs are, the better they function as glue and base for the lead. The difference between corrected and uncorrected BGVs is night and day - uncorrected ones smear, corrected ones feel like one instrument.
51. Bus all BGVs together
One bus, similar processing. I usually roll off the high end to make them darker so the lead vocal sticks out in front.
52. Use doubles to support the lead
Different job than BGVs. Doubles thicken, BGVs harmonize.
53. Micro-adjust your doubles
Shift them slightly in cents (up or down), and slightly in time. Small offsets on either side add real width.
54. Actually re-record your doubles
Copy-paste isn’t a double. And when I re-record, I perform at a different intensity level than the lead - usually softer - so it tucks underneath instead of competing.
55. Try formant shifting
One of my favorite vocal effects. It doesn’t change the pitch, it changes the harmonics - so the same note can sound deeper or higher. Great for creating character layers.
56. Split the lead across multiple tracks
I use different tracks for different sections, especially when the pre-chorus and chorus need different processing.
57. Create vocal contrast between sections
For this song I made the pre-chorus vocal really focused in the mid-range, then let the chorus vocal open all the way up. The chorus feels twice as big and I barely touched the fader.
58. Turn breaths down, don’t delete them
Deleting breaths sounds unnatural to me. I find them and turn them down with the gain tool instead. Same approach for plosives and esses.
If you want a checklist for this whole process, I put together a free Vocal Production Checklist that walks through it step by step. There’s also a free Vocal Analyzer if you want to see where your vocal sits frequency-wise.
Low End - “Make It Knock”
This is not a stretch to make a YouTube video more entertaining. No. This is advice.
59. Kick and bass can’t own the same space
Decide who takes the sub frequency and who doesn’t. Both can’t have it.
60. Kick decay decides bass shape
- Long sustained kick → short, punchy bass
- Short punchy kick → long, sustained bass
They fill in each other’s gaps.
61. Split your bass into two tracks
Duplicate the bass. High-pass one, low-pass the other. Now one track handles the sub frequencies and one handles the lower mid-range - and you can process each completely differently.
62. Sidechain only the low end
You don’t need to duck the whole bass. Sidechain just the low frequencies of your bass to your main kick. All the space, none of the pumping.
63. Reference your subs visually
Most home studio speakers cannot accurately reproduce the low low end. The ones that do are dedicated subs - and putting a sub in a small, untreated room is begging for room modes and frequency problems.
Use a spectrum analyzer. Trust your eyes down there.
64. Most of the bass is in the mid-range
If you can hear the bass properly in the mid-range, there’s a good chance the rest falls into place.
That’s honestly true for the majority of the mix.
Drums & Groove - “Off Grid”
It’s one thing for your low end to be chef’s kiss. It’s another thing for your track to actually groove.
65. Groove lives off the grid
A huge amount of a song’s feeling comes from groove, and groove comes from the slight mistimings of playing.
I’ll die on this hill. Sorry, four-on-the-floor EDM heads - your music is great, I just think things are more danceable when they’re not married to the grid.
We’re looking for divorced tracks.
66. Use ghost notes
Ghost notes are the quieter notes in between the main notes. They add a ton of rhythm without adding volume. The bass part in this song is built almost entirely on ghost notes - pull them out and the whole thing goes limp.
67. Play parts by hand
I play almost everything in by hand, which is a big part of why the drum kit is so off grid. That’s intentional. That’s the feel.
68. Think about where melodic instruments fall rhythmically
Melodic parts have rhythm too. In this song I turned one of the pads down on the two and four to emphasize the snare hitting there.
69. Layer a real snare underneath
Add a real snare at varying volumes under your programmed one. Instant humanization.
70. Use gated reverbs on snares
They give you a very rhythmic way of adding reverb without drowning the whole mix.
71. Sidechain any two instruments for groove
It doesn’t have to be kick and bass. Sidechain the snare to the background vocals. Sidechain the kick to a synth. Anything can duck anything, and groove can come from anywhere.
Space - Reverb, Delay, and the Third Dimension
Up to now we’ve been working in one dimension. Time to grab the blue and red glasses, because songs are 3D.
72. Understand what space actually communicates
Reverb and delay tell your brain what kind of room a sound is in. That’s it. That’s the whole mechanic.
73. The mix exists in three dimensions
- More reverb or delay = further away from the listener
- Left and right panning = the horizontal axis
The closest possible thing you can perceive: a completely dry mono signal dead center.
The furthest: hard-panned, super-wet, drenched in reverb.
74. Keep your most important elements center and mono
Kick. Snare. Bass. Lead vocal. Those live in front, dry, in the middle.
75. Transient shape your vocal reverb send
I send my vocal to a separate reverb bus and put a transient shaper on it to kill the initial attack. That stops stray esses and plosives from getting blown up into the reverb tail.
76. Duck the reverb with the vocal
Sidechain the reverb bus to the main vocal. Reverb gets out of the way while the vocal is singing, then blooms in the gaps.
77. Build small, medium, and large rooms
I almost always put reverbs on buses. I keep three: small room, medium room, large room. Then I can send any instrument to those same spaces so everything feels like it’s in the same physical place.
78. Use pre-delay to keep the vocal up front
More pre-delay = the dry vocal transient hits before the reverb, so the vocal sticks out more.
79. Choose your delay flavor deliberately
- Synced to BPM - locks into the groove, sits in the pocket
- Desynced from BPM - sticks out, gets noticed
Pick based on whether you want the delay to blend or to be heard.
If you want exact delay times for your tempo, I built a free Production Delay Calculator that does the math for you.
80. Send delay into reverb
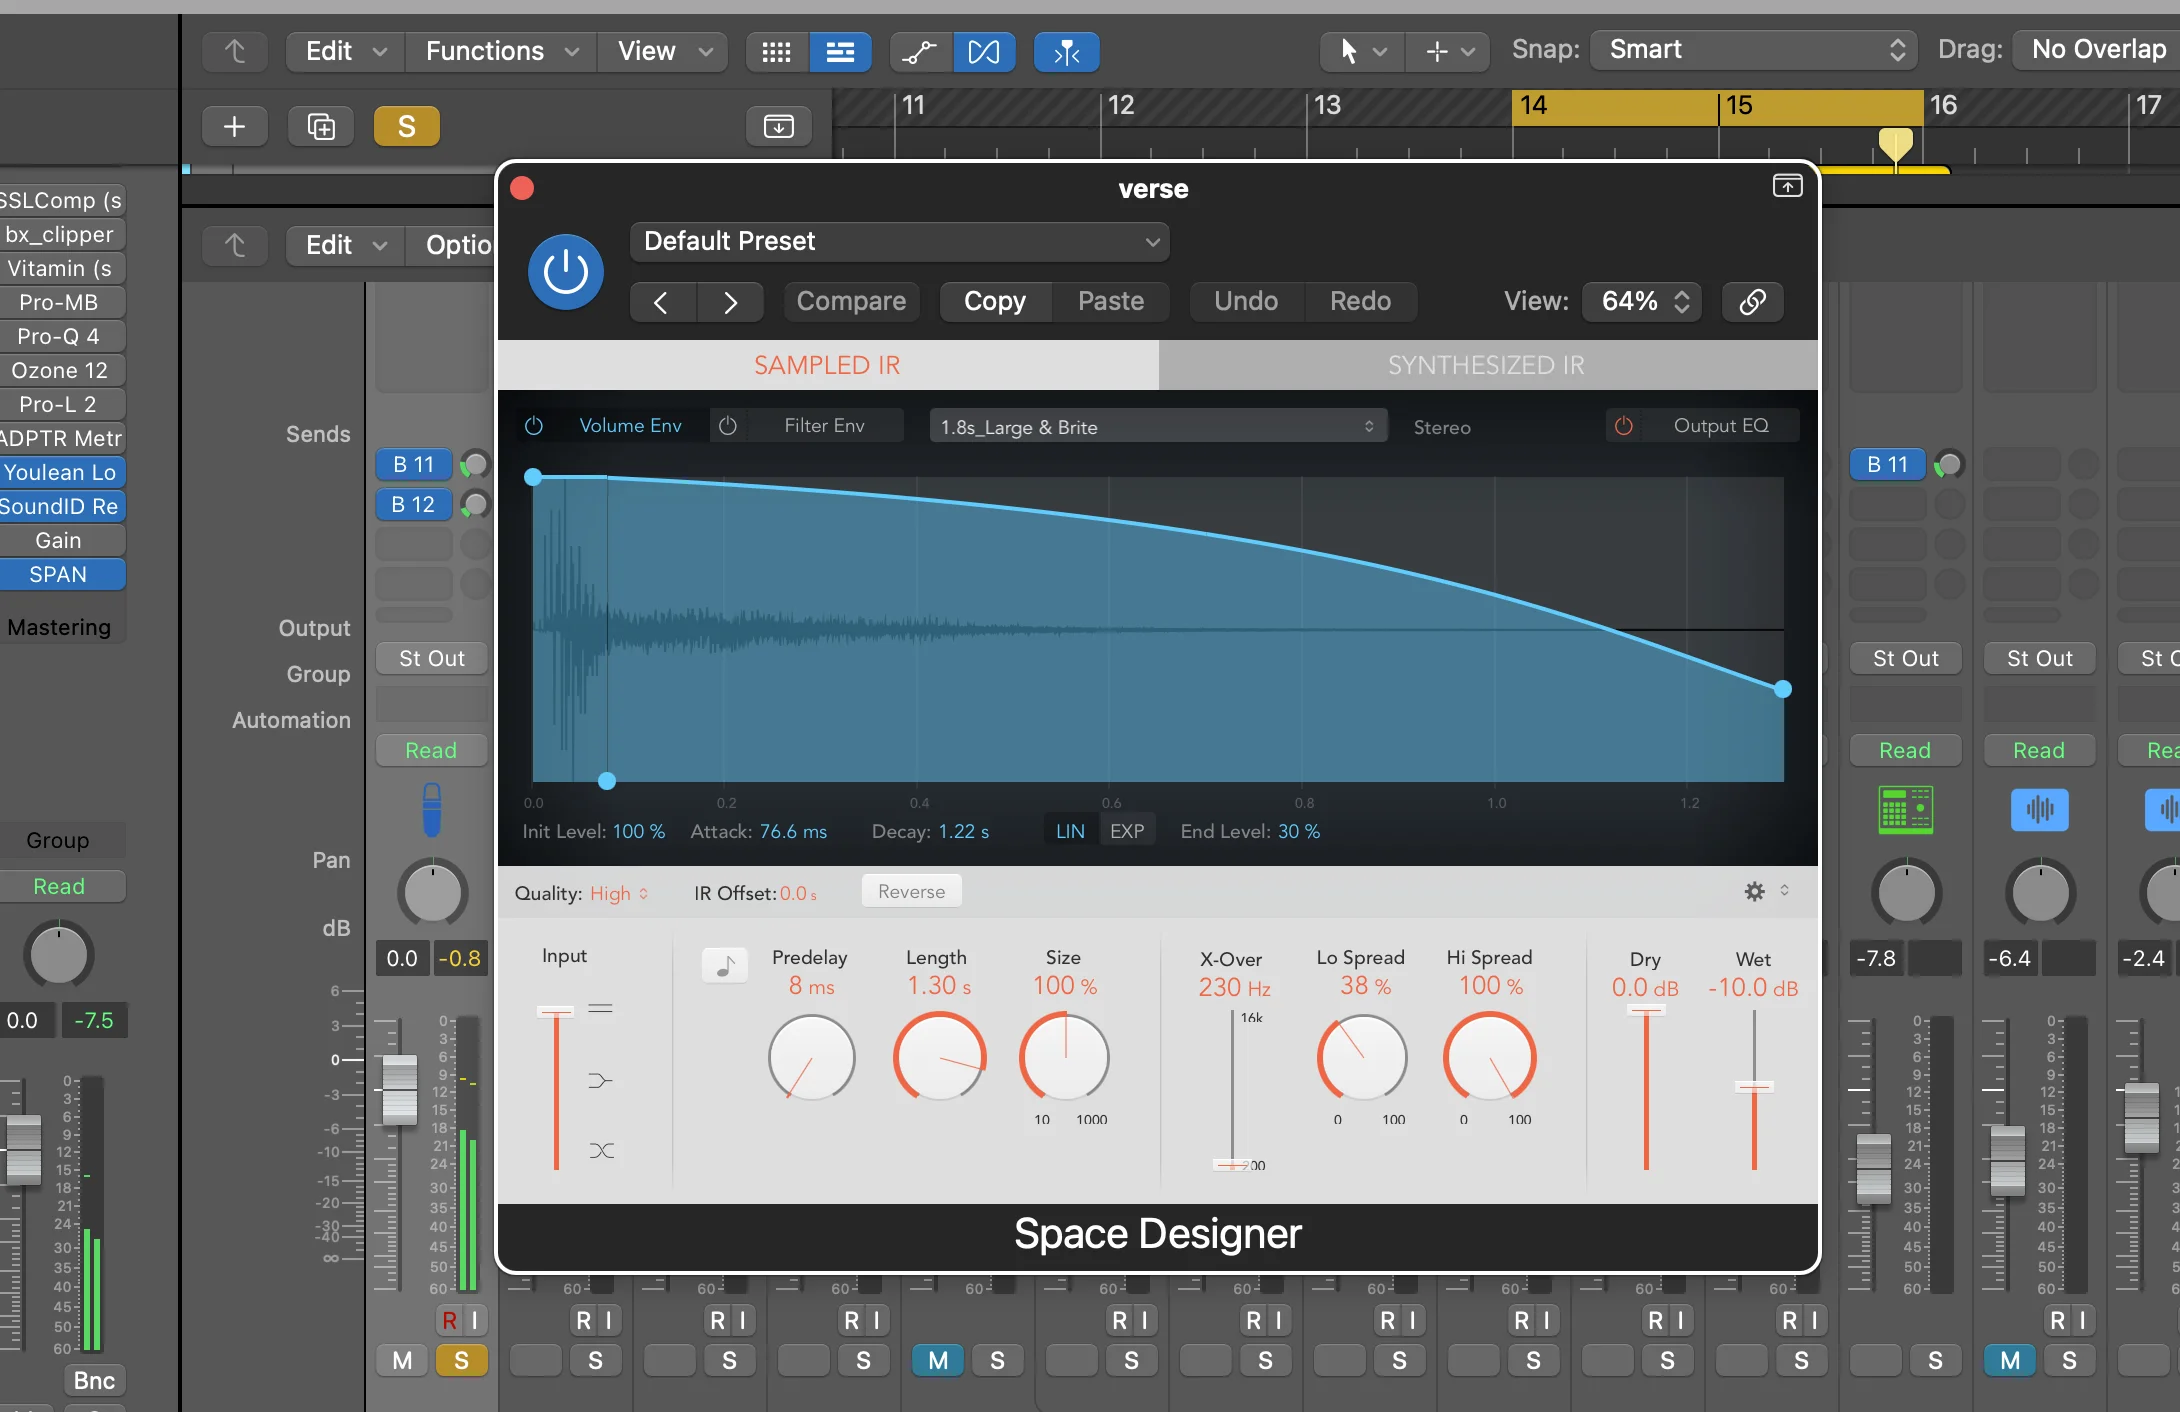
Almost always. Delay first, then reverb on the tail. Sounds way more natural than running them in parallel.
81. The easy delay throw trick
- Duplicate the vocal track with all the same plugins
- Take just the snippet you want to throw
- Duck it down
- Throw on your delay at 100% wet
- Mix it to taste
No automation, no send gymnastics.
82. The reverse reverb transition
For a cool transition effect:
- Take a longer syllable you sang
- Duplicate it to a new track
- Add a lot of reverb directly on the track (not a send)
- Bounce in place
- Flip it around backwards
- Add another ton of reverb
Instant pre-chorus swell.
83. EQ your reverb
Don’t be afraid to cut the lows and the highs out of your reverb. It cleans up a mix enormously.
84. Reverse + pitch up for atmosphere
Same reverse trick, but this time pitch it up 12 semitones. Completely different result, great for pads and atmosphere.
85. Use shimmer reverb for atmosphere
My go-to when I want something to feel big and ethereal.
Ear Candy & Automation - “Nail the Fade”
Everybody likes candy. Adults, kids, ears. The more little sugar hits you give listeners, the more likely they stick around.
86. Be literal with your ear candy
In this song I literally say “knock knock knock” - so I added a knocking sound. Sometimes the obvious idea is the right idea.
87. Follow the melody for placement
Anytime there’s a break in the melody, that’s an opening for ear candy. Between the pre-chorus and the drop there was a wide gap, so I filled it with a throat clear. Costs nothing, adds personality.
88. Automate the gain of the whole track
Even half a decibel into the chorus gives it a lift.
89. Never automate the fader - automate a gain plugin
This is a big one. If you automate the track’s volume fader, you lock the fader in place and can’t make broad moves anymore.
Instead, put an independent gain plugin on the channel and automate that. Fully flexible, and your fader stays yours.
90. Automate the send, not the reverb
Same principle. Automate the amount going into the reverb, not the reverb’s parameters.
91. Automate single EQ bands
I do this for choruses - automate a presence band up to add more clarity and excitement exactly when it matters.
92. Use LFOs for automation
LFOs automatically sync filters and parameters to your song so sounds evolve on their own. My favorites are ShaperBox and LFO Tool.
93. Use latch mode instead of hunting through menus
Instead of digging through endless automation parameter menus:
- Set the track’s automation mode to latch
- Play the song
- Move the parameter you want
- The automation lane appears automatically
- Switch back to read mode and edit it normally
Massive time saver.
94. Sounds that evolve over time are just cooler
I have zero data to support this. It’s my opinion and I’m confident in it.
Finishing - “Press Replay”
Mastering deserves its own post as detailed as this one. But here’s the truth: the majority of your master’s sound comes from how good the mix was in the first place.
Here’s what I do to make sure the mix is as good as it can be before it goes anywhere.
95. Use loudness-matched references
I reference a lot, always in the same genre, always loudness matched. Then I flip back and forth to find where my song is lacking and what needs to come up or down.
Unmatched references are useless - louder always wins.
96. Mix at the right times of day
The two best windows:
- Your first 20 minutes in a new session
- The next morning
Fresh ears hear problems you’ve been deaf to for hours.
97. Mix mostly on headphones
For most home studios, headphones are the better tool. No frequencies bouncing around an untreated room, and a far more accurate read on your low end.
That said - some things genuinely need a real room. Reverb is at the top of that list.
98. Check on everything
Monitors. Car speakers. Phone speaker. AirPods. Laptop. Whatever your listeners actually use. Your mix has to survive all of it.
99. Buy plugins that save you time, not plugins that sound expensive
Let me dispel a myth: you do not need a pile of expensive plugins to get a sound like this. You absolutely don’t.
The plugins worth investing in are the ones that save you hours. That’s the whole reason I built the ones I did - so you can stop manually automating gain for forty minutes per vocal take.
100. Listen at conversational level or lower
Quiet listening naturally highlights the mid-range, which is the most important part of your song to get right. If it works quiet, it works loud.
101. Swap left and right
Been staring at the same mix for hours? Flip the sides. Your ears acclimatize insanely fast, and that one perspective shift is often enough to hear the problems you’ve gone blind to.
102. Vari-speed it
Same idea - drop the playback speed a couple percentage points and listen. Different perspective, same mix, new problems revealed.
103. Take actual breaks
Fifteen minutes. Go for a walk. Reset your ears. It also helps with creative ideas and, you know, being a functional human being.
104. Good mixing is about taking away, not adding
Muting tracks. Deleting tracks. Being ruthlessly deliberate about what sounds you actually use.
That’s how you get better at mixing faster than anything else on this list.
The Bonus Tip - The One I Struggle With Most
After 100 tips, here’s one more. And it’s the one I personally fight with hardest as a musician.
Done is a decision, not a feeling.
Your perfectionism is stopping you from making the next thing - which is the thing that’s actually going to make you better.
You will never wake up and feel like a track is perfect. That feeling isn’t coming. But you can still decide it’s finished and release it.
Putting It All Together
Here’s the order all of this actually happens in, if you want the short version:
- Sounds first - fix it at the source, choose deliberately, layer smart
- Organize - color, bus, name, hide, clip gain
- Rough balance - faders only, no plugins
- EQ - in context, never in solo, carve space
- Compression - ride gain first, then two compressors doing two jobs
- Saturation - beef, harmonics, clipping on the drum bus
- Vocals - ride, tune, double, harmonize, contrast section to section
- Low end - kick and bass divide the territory, reference visually
- Groove - get off the grid, ghost notes, sidechain anything to anything
- Space - three dimensions, small/medium/large rooms, ducked reverbs
- Ear candy and automation - gain plugins not faders, LFOs, latch mode
- Finish - reference, check everywhere, take breaks, ship it
A hundred tips is a lot. You’re not going to internalize all of them today, and you shouldn’t try. Pick three from this list you’ve never done before, apply them to whatever you’re working on right now, and see what changes.
Then come back and grab three more.
And when you’re 80% happy with it? Put it out. Done is a decision.
Tired of riding vocal levels by hand? My magic.RIDE plugin auto-levels your vocal performance in one pass - drop it on the track, hit auto-target, and your dynamics are sorted before the compressor even sees the signal.
About Mattie
Mattie is a music producer, songwriter, and educator specializing in Logic Pro and vocal production. With over 10 years of experience in the music industry, he's helped thousands of artists transform their home studio recordings into professional-quality tracks.
As the founder of Music By Mattie, he creates tutorials, presets, and courses that simplify complex production techniques. His mission is to make professional music production accessible to everyone, regardless of budget or experience level.