
Giving Musicians the Tools to Make Better Music
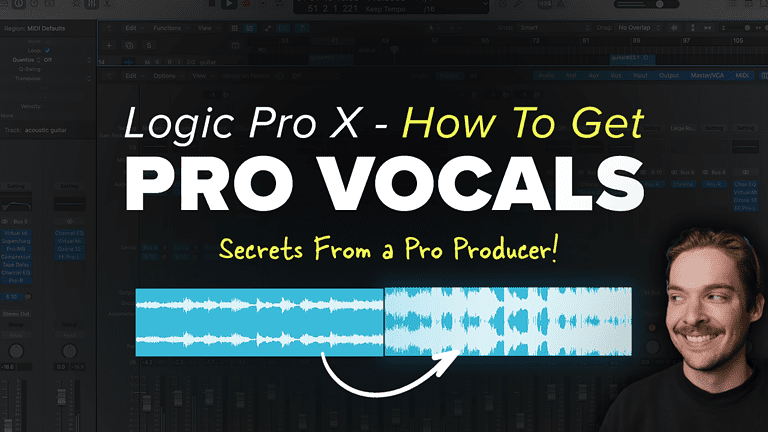
How to Get Pro Vocals in Logic Pro X
How to Get Pro Vocals In Logic Pro X!
Key Takeaways:
- You don’t need expensive plug-ins to get great sounding vocals
- A good recording is key for a pro sound
- Don’t let any one plug-in do all of the work
Getting your vocals to sound right can be so frustrating!! GAAAH
It’s one of the biggest differences between professional sounding songs and songs that sound like they were made in a basement.
In this article, I’m going to show you how to get your vocals sounding just like a professional studio recording with no prior experience all using stock logic pro plug-ins.
Here’s a video, if you want a breakdown of this article!
My name is Mattie and if you’re like me, you want your projects to stand out and sound amazing. Getting good quality vocals with Logic Pro can be a challenge, but with my simple techniques, you’ll be able record, mix, and give your songs that polished sound you’ve been wanting.
Let’s dive into step 1:
“Anyone can get professional sounding vocals” -Mattie
Step 1: Recording
Before we can do anything else, we need actual vocals. And we need to be smart about how we record them. Getting your vocals right in the recording stage will save so much headache later on.
In order to get a professional recording, the first thing you’ll need is a good microphone. A good microphone will keep your voice sounding clear and crisp, and luckily good microphones aren’t expensive. In this example, I’ll be using a shure sm58 which costs around $75 and would be my first microphone recommendation for any producer looking to buy. If you’re willing to upgrade, an inexpensive condenser microphone like the at-2020 would be a great choice. I’ll make a video later describing the differences between a cardiod like the sm-58 i’m using and the condenser at-2020.
I also won’t spend too much time on proper recording technique because it really deserves it’s own video, but here is bulleted check list to follow to get great recordings.
- Set your levels right and make sure you’re not clipping when you sing
- Distance yourself between 4 and 8 inches away from the microphone
- Record yourself in a treated room – and if you can’t then try use a dead sound spot like a clothes closet or a makeshift vocal booth
- Nail the timings or the flow of the song while recording (this can’t be changed easily later)
- Take multiple takes and comp them together to get one mega take.
After following those steps, you should have an audio file that’s ready for step 2 which is really where the magic happens.
Step 2: Adding Plug-Ins
Gain Staging
Now that you’ve got you vocals recorded and the sound good, let’s start diving in and making them sound as good as possible using stock plugins.
The first thing I want to is go through vocal and help balance any dynamic parts I see in the waveform or hear with my ears. Balancing the volume of the vocals before putting effects on them will give us a more consistent result than if we didn’t. Some vocals, especially rap vocals won’t need adjusting because they will already be consistent enough in volume.
If we click this button on logic, we can make the waveforms more visible, which will help us adjust the settings here. I’m going to highlight by pressing command and using the marquee tool and then adjust parts up or down in gain by dragging up or down here.
Here’s what my vocal looked before, and here’s what it looks like after. It’s more dynamically consistent, which means we will use less compression in the end, and it will give us a better result.
Vocal Tuning
Logic’s vocal tuning plug-in is under the pitch folder. Anytime I add a vocal tuning plug-in, it is the first part of my vocal plug-in chain. I’ll first adjust this parameter to the correct key of the song. If you don’t know what the key is, hit subscribe to stay tuned for a video I’ll be releasing on how to find out the key of a song without any music theory knowledge!
Then I will adjust the timing until I get the result I want. A more natural vocal will need a slower timing speed, while a more auto-tuned sound will be a fast timing speed.
EQ
Next, let’s add EQ. EQ is extremely important, but it’s hard to get right for beginners. I will show you exactly what I would do for this vocal recorded through the sm58, but these settings might not be what I would do on your particular vocal.
To start, I high pass all of the low end information out from the vocal. Around 125 hz sounds good. Next, I’ll subtract the frequencies around 250 – 500 hz and again from 500 – 1000 hz. With a sm58, I often have to subtract a lot of gain, sometimes up to 8db, from these areas so it sounds more clear. And lastly, I will give the high end a top end shine around 8 or 9khz with a 2 db increase.
Here’s the before. And here’s the after.
If you’ve been messing around with the EQ for a while and things aren’t sounding good, I’ve actually got a full vocal preset pack for logic that you can get from my website so you can skip this step and all the rest!
Compression
After EQ, it’s time to add compression. Compression will give us a more consistent loudness throughout the whole recording! Even though we gain staged the track before hand, we want our vocals to be at the forefront of the mix! That means compression!
In logic, I really like using the FET compressor which similar to the 1176 compressor I use with paid plug-ins. For vocals I often use a medium to fast attack time and a fast release time and a 4:1 compression ratio. On this first compressor, I’m looking for about -5 db in gain reduction. I’ll adjust the threshold until I I’m getting about that much.
Next I’ll duplicate that compressor and use most of the same settings. But this time I’m going to change the threshold down more until I’m getting 5db’s of reduction then I will take this dry/wet knob and mix it back a tad to help preserve some of the transients.
I find adding two compressors in a row gives me a better more natural sounding compression than one compressor alone.
De-Ess
Next on the list, lets add a de-esser. A de-esser will take harsh sibilant sounds like ‘sss’ and turn them down. This is especially important after boost the high frequencies in the EQ! We want that crispness, but when an S comes up it can be too harsh to sound good.
The key to de-essing is finding a vocal part with an ‘s’ and A/B testing that part with plug-in on and off.
Distortion
Now that we’ve added those plug-ins lets add some subtle distortion to the vocal to give it some thickness and uuumph. I will use the overdrive plug-in for this example. Set low pass frequency to 20khz and adjust the input and output to taste.
Ambience
Next up is ambience. We’re going to acheive this affect by routing to a bus. To route to a bus click below the track plug-ins here. If you don’t see this you can click “i” on your keyboard or click the i up here.
Select a track that you want your bus to be on and put on a reverb. In this case, I’ll use space designer. In space designer, I’ll scroll through the presets until I find one that I like. Ambience is a short reverb so I’m going to select one in the small category. Next, I’m going to set the wetness to 100% and the dry to 0. This is a bus track so we don’t want any of the original dry signal to come through.
Now that we have this set-up, we can adjust this parameter here, by how much volume we want to send to this track. Adjust to taste!
Reverb
Sweet! Now let’s add reverb! We’re going to follow the same steps as before with the ambience. This time we’ll add a larger reverb. But the rest of the steps are the same. Adjust the mix to taste.
Delay
After adding the reverbs, our sound doesn’t sound so in your face and recorded in a studio. But now, we need to add Delay to give it even more atmosphere and interest. Once again we’re going to create a bus track to route to so we can blend the two sounds together.
This time on the bus track add a delay. I’ll use stereo delay. Put the mix to 100% wet 0% dry and adjust the timings to what you want in the song. I like to vary the right and left ears to give a bigger sense of space.
Then, as always, adjust the volume of the send to taste.
Final Sound and Tips
Now that you’ve followed all those steps, your vocal should be sounding much better! But there are some more things you can do to get your voice sounding even more professional. There a bit out of the scope of this video, but here they are:
- Add harmonies
- Record a double and triple track and pan them hard left and right
- Record ad libs
- Record octave doubles
All of these techniques can help give your song more interest and intrigue, and what’s cool is you can use the same vocal chain you had before on the lead vocal. And now adjust the volumes differently or even adjust the sends depending on the sound you want!
Conclusion
Making your vocals sound great doesn’t have to be complicated. Feel free to copy this exact chain that I’ve made and your voice will sound more professional. I’ve also got a completely free vocal preset pack for logic that you can download in the description below! You can use it to get these exact parameters all done for you with 10 different preset options! Leave me any comments on questions you might have or videos you’d like to see in the future. Until next time!
Thanks for reading! If you still need help, check out my Free Vocal Presets for Logic Pro X that will get your vocals sounding amazing in no time!!
Check Out Our Other Articles!
Table of Contents

Mattie
Hey there, I'm Mattie—the man behind the beats, bytes, and blogs at Music By Mattie. With over 20 years jamming in studios and on stages, I've seen it all—or at least heard it. I created this space to cut through the noise (yeah, that's a pun) and give you straightforward, actionable audio advice.
Come join the ever growing 30,000 audio lovers looking to expand their sound! There's plenty of room!
All Posts
Post Info
Join "5 Beat Friday"
Every week you'll get 5 beats about the production world. Join the over 5,000+ other producers bettering themselves through 5 Beat Friday!